Building a tennis court is a dream for many sports enthusiasts. Whether you envision a professional-grade court or a simple backyard setup, understanding the process and costs involved is crucial. The allure of having a personal tennis court lies not just in the convenience it offers but also in the enhancement it brings to your lifestyle and property value. This guide will walk you through the steps of building a tennis court, from planning and design to construction and maintenance, ensuring you make informed decisions at every stage.
Understanding the Costs Involved
Cost Estimation of Building a Tennis Court
Before diving into construction, it’s essential to grasp the financial aspect. Building a tennis court is a significant investment, and understanding the variables that affect the cost can help in effective budgeting. The price to build a tennis court can vary significantly based on several factors, including location, materials, and whether it’s an indoor or outdoor court. Consideration of these factors early on will allow for a more accurate cost estimation and help in identifying potential areas where savings can be made.
How Much Does It Cost to Build a Tennis Court?
Generally, the cost to build a tennis court ranges from $25,000 to $100,000 or more. Here’s a breakdown of what influences these costs:
- Site Preparation: This includes clearing the land, leveling the ground, and ensuring proper drainage. Costs can range from $5,000 to $10,000. The complexity of the terrain and the amount of clearing required can significantly affect this cost. Additionally, obtaining permits and adhering to local zoning laws might add to the expenses.
- Materials: The choice of surface material (asphalt, concrete, clay, grass, or synthetic) significantly impacts the cost. Asphalt or concrete courts typically cost between $40,000 and $60,000. Each material offers different benefits and drawbacks, such as durability versus maintenance needs, which should be weighed against the initial cost.
- Labor: Professional labor for installation can cost between $15,000 and $30,000. Hiring experienced contractors ensures the court is built to regulation standards and can withstand regular use. The complexity of the design and additional features can increase labor costs.
- Additional Features: Lighting, fencing, and seating can add to the overall cost. These features enhance the usability and safety of the court, allowing for nighttime play and providing comfort to spectators. Each additional feature should be considered for its long-term benefits versus initial costs.
Planning Your Tennis Court Design
Tennis Court Design Blueprint
The design of your tennis court is a critical factor that affects both the playability and aesthetics of the court. A well-thought-out design can enhance your playing experience, increase the court’s longevity, and integrate seamlessly with your property’s landscape. Consider these elements when planning your tennis court design to ensure it meets your needs and complements your surroundings.

Size and Orientation
A standard tennis court measures 78 feet in length and 36 feet in width for doubles play. Ensure you have enough space, including additional room around the court for safety and comfort. Adequate spacing around the court is crucial not only for gameplay but also for player safety and audience accommodation.
- Orientation: Ideally, courts should be oriented north-south to minimize the effects of sun glare. This consideration ensures that players are not distracted by the sun during play, enhancing the playing experience. Seasonal changes in sunlight direction should also be considered to optimize the court’s usability throughout the year.
Surface Material
Choose a surface that suits your needs and budget. Here’s a quick overview:
- Asphalt: Durable and relatively low-cost, but may require resurfacing every 4-6 years. It offers a hard surface that provides a consistent bounce, making it a popular choice for many tennis facilities.
- Concrete: Offers excellent durability and low maintenance but can be more expensive. Its longevity makes it a cost-effective option in the long run, despite the initial investment.
- Clay: Provides a slower playing surface and is easier on the body but requires regular maintenance. The unique playing experience it offers makes it a preferred choice for many tennis enthusiasts.
- Grass: Offers a traditional feel but demands high maintenance. Grass courts are less common due to the upkeep required but provide a classic tennis experience.
- Synthetic: Low maintenance and available in various textures and colors. These surfaces can mimic the playing characteristics of other materials while requiring less upkeep.
Steps for Tennis Court Construction
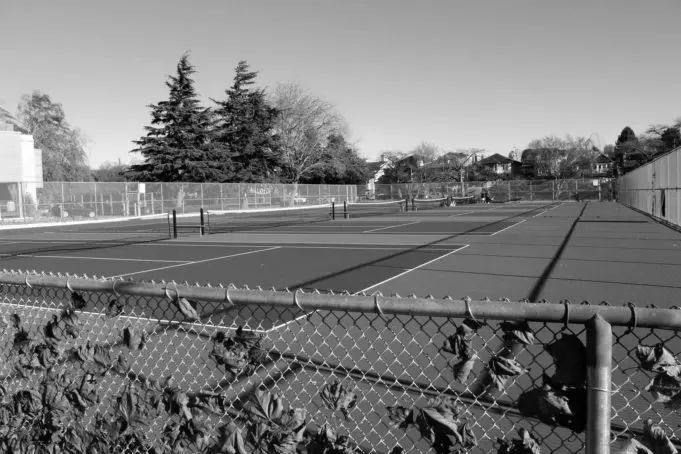
Step 1: Site Selection and Preparation
Choose a location with good drainage and minimal slope. Clear the area of vegetation and debris, then level the site. Proper drainage is crucial to prevent water accumulation, which can damage the court surface and affect play. An initial site assessment can help identify any potential challenges and ensure the location meets all necessary requirements.
Step 2: Base Construction
The foundation is vital for the longevity of your court. Typically, a base of crushed stone or gravel is laid to facilitate drainage. A geotextile fabric can be added to prevent weed growth. The quality of the base construction is critical, as it supports the entire court structure and influences its durability and performance over time.
Step 3: Surface Installation
Depending on your chosen material, the surface installation process will vary:
- Asphalt and Concrete: These require a smooth, even pour to ensure a level playing surface. Curing time is essential before any use to prevent damage to the surface.
- Clay and Grass: These surfaces need proper installation techniques to ensure durability and consistency. Regular maintenance is required to keep these surfaces in optimal condition.
- Synthetic: These materials are often rolled out and adhered to the base. They offer a quick installation process and are available in a variety of styles to suit different preferences.
Step 4: Painting and Marking
After the surface has been laid, it’s time to paint the lines and markings. Ensure they adhere to official dimensions and are easily visible. High-quality paint and precise application ensure the markings last and remain clear for gameplay. Regular touch-ups may be necessary to maintain their visibility.
Step 5: Installing Accessories
Add fencing to contain balls and lighting for night play. Seating, scoreboards, and a net system complete the setup. These accessories enhance the court’s functionality and can improve the overall experience for players and spectators. Thoughtful placement and quality materials can extend the life and usability of these features.
DIY Tennis Court: Is It Possible?
For those with a knack for DIY projects, building a tennis court can be a rewarding challenge. While professional installation is recommended for precision and durability, a DIY tennis court can reduce costs. Here are some tips:
- Research and Plan Thoroughly: Understanding every step of the process is essential. Detailed planning can prevent common pitfalls and ensure the project runs smoothly. Use online resources, books, and videos to gather information and learn from others’ experiences.
- Rent or Purchase Necessary Equipment: Heavy machinery may be required for site preparation and base construction. Ensure you have access to the right tools and equipment to handle the tasks effectively. Consider renting equipment to reduce costs if you don’t plan on using it regularly.
- Seek Professional Advice: Consulting with an expert can help avoid costly mistakes. Even if you undertake most of the work yourself, professional guidance can ensure that critical aspects like drainage and surface leveling are handled correctly.
Maintenance and Upkeep
Once your court is built, regular maintenance ensures it remains in top condition. A well-maintained court not only provides a better playing experience but also extends the life of the court, protecting your investment. Here’s a basic upkeep plan:
- Regular Cleaning: Sweep or wash the surface to remove debris. Regular cleaning prevents dirt buildup and keeps the surface in optimal playing condition. Use appropriate cleaning solutions that won’t damage the surface material.
- Surface Repairs: Address cracks or chips promptly to prevent further damage. Regular inspections can catch small issues before they become major problems, reducing repair costs and downtime.
- Seasonal Maintenance: Check drainage systems, repaint lines, and ensure the net is in good condition. Seasonal checks help prepare the court for different weather conditions and ensure all components are functioning properly. Adjust maintenance routines to suit the specific needs of your chosen surface material.
Conclusion
Building a tennis court is a significant investment in both time and money, but the rewards of having a personal play space are unmatched. A personal court offers the convenience of play at any time, adds value to your property, and can be a source of pride and enjoyment. By understanding the costs, planning carefully, and following a structured construction process, you can create a court that meets your needs and enhances your property.
Whether you’re installing a professional-grade court or a simple backyard tennis court, the key is to focus on quality and longevity. With the right planning and execution, your tennis court can provide years of enjoyment and exercise. Consider future needs and potential expansions or upgrades when planning your initial design to ensure the court remains relevant and functional over the years.
Explore your options, plan your budget, and soon, you’ll be serving aces on your own court! With thoughtful planning and execution, your dream of having a personal tennis court can become a reality, offering a perfect blend of leisure, exercise, and entertainment.